 |
Permanent Liberty Virtual Courtroom Programs Program Download, Install and Settings for Permanent Liberty Virtual Courtroom Participants |
 |
Permanent Liberty Virtual Courtroom Programs Program Download, Install and Settings for Permanent Liberty Virtual Courtroom Participants |
|
Liberty Virtual Courtroom Permanent Program Download, Install and Settings Generally, courts will create links and phone codes for temporary users attending virtual court hearings. The links and phone codes will be sent to participants and provide access for a limited number of days on individual matters. Other participants who are engaged with the court on an ongoing basis are considered permanent users and will have long-term access to the virtual court. Permanent users must install the Liberty Virtual Courtroom program. iOS and Android users, both temporary and permanent, must install the Liberty Virtual Courtroom program for their device before attempting to access the courtroom. Note that if you have received a temporary link and want to use an iOS or Android device to access the virtual court, then you must install the program on your device before you click on the link.
Anyone authorized by the court may download, install and use the Liberty Virtual Courtroom program at no cost. Windows Liberty Virtual Courtroom Permanent Program Courtroom participants using Windows must:
Downloading, Installing and Configuring the Program Prior to configuring the program, you must contact your court to obtain a valid user name. Configure your "Connection Profile" settings, as described below.
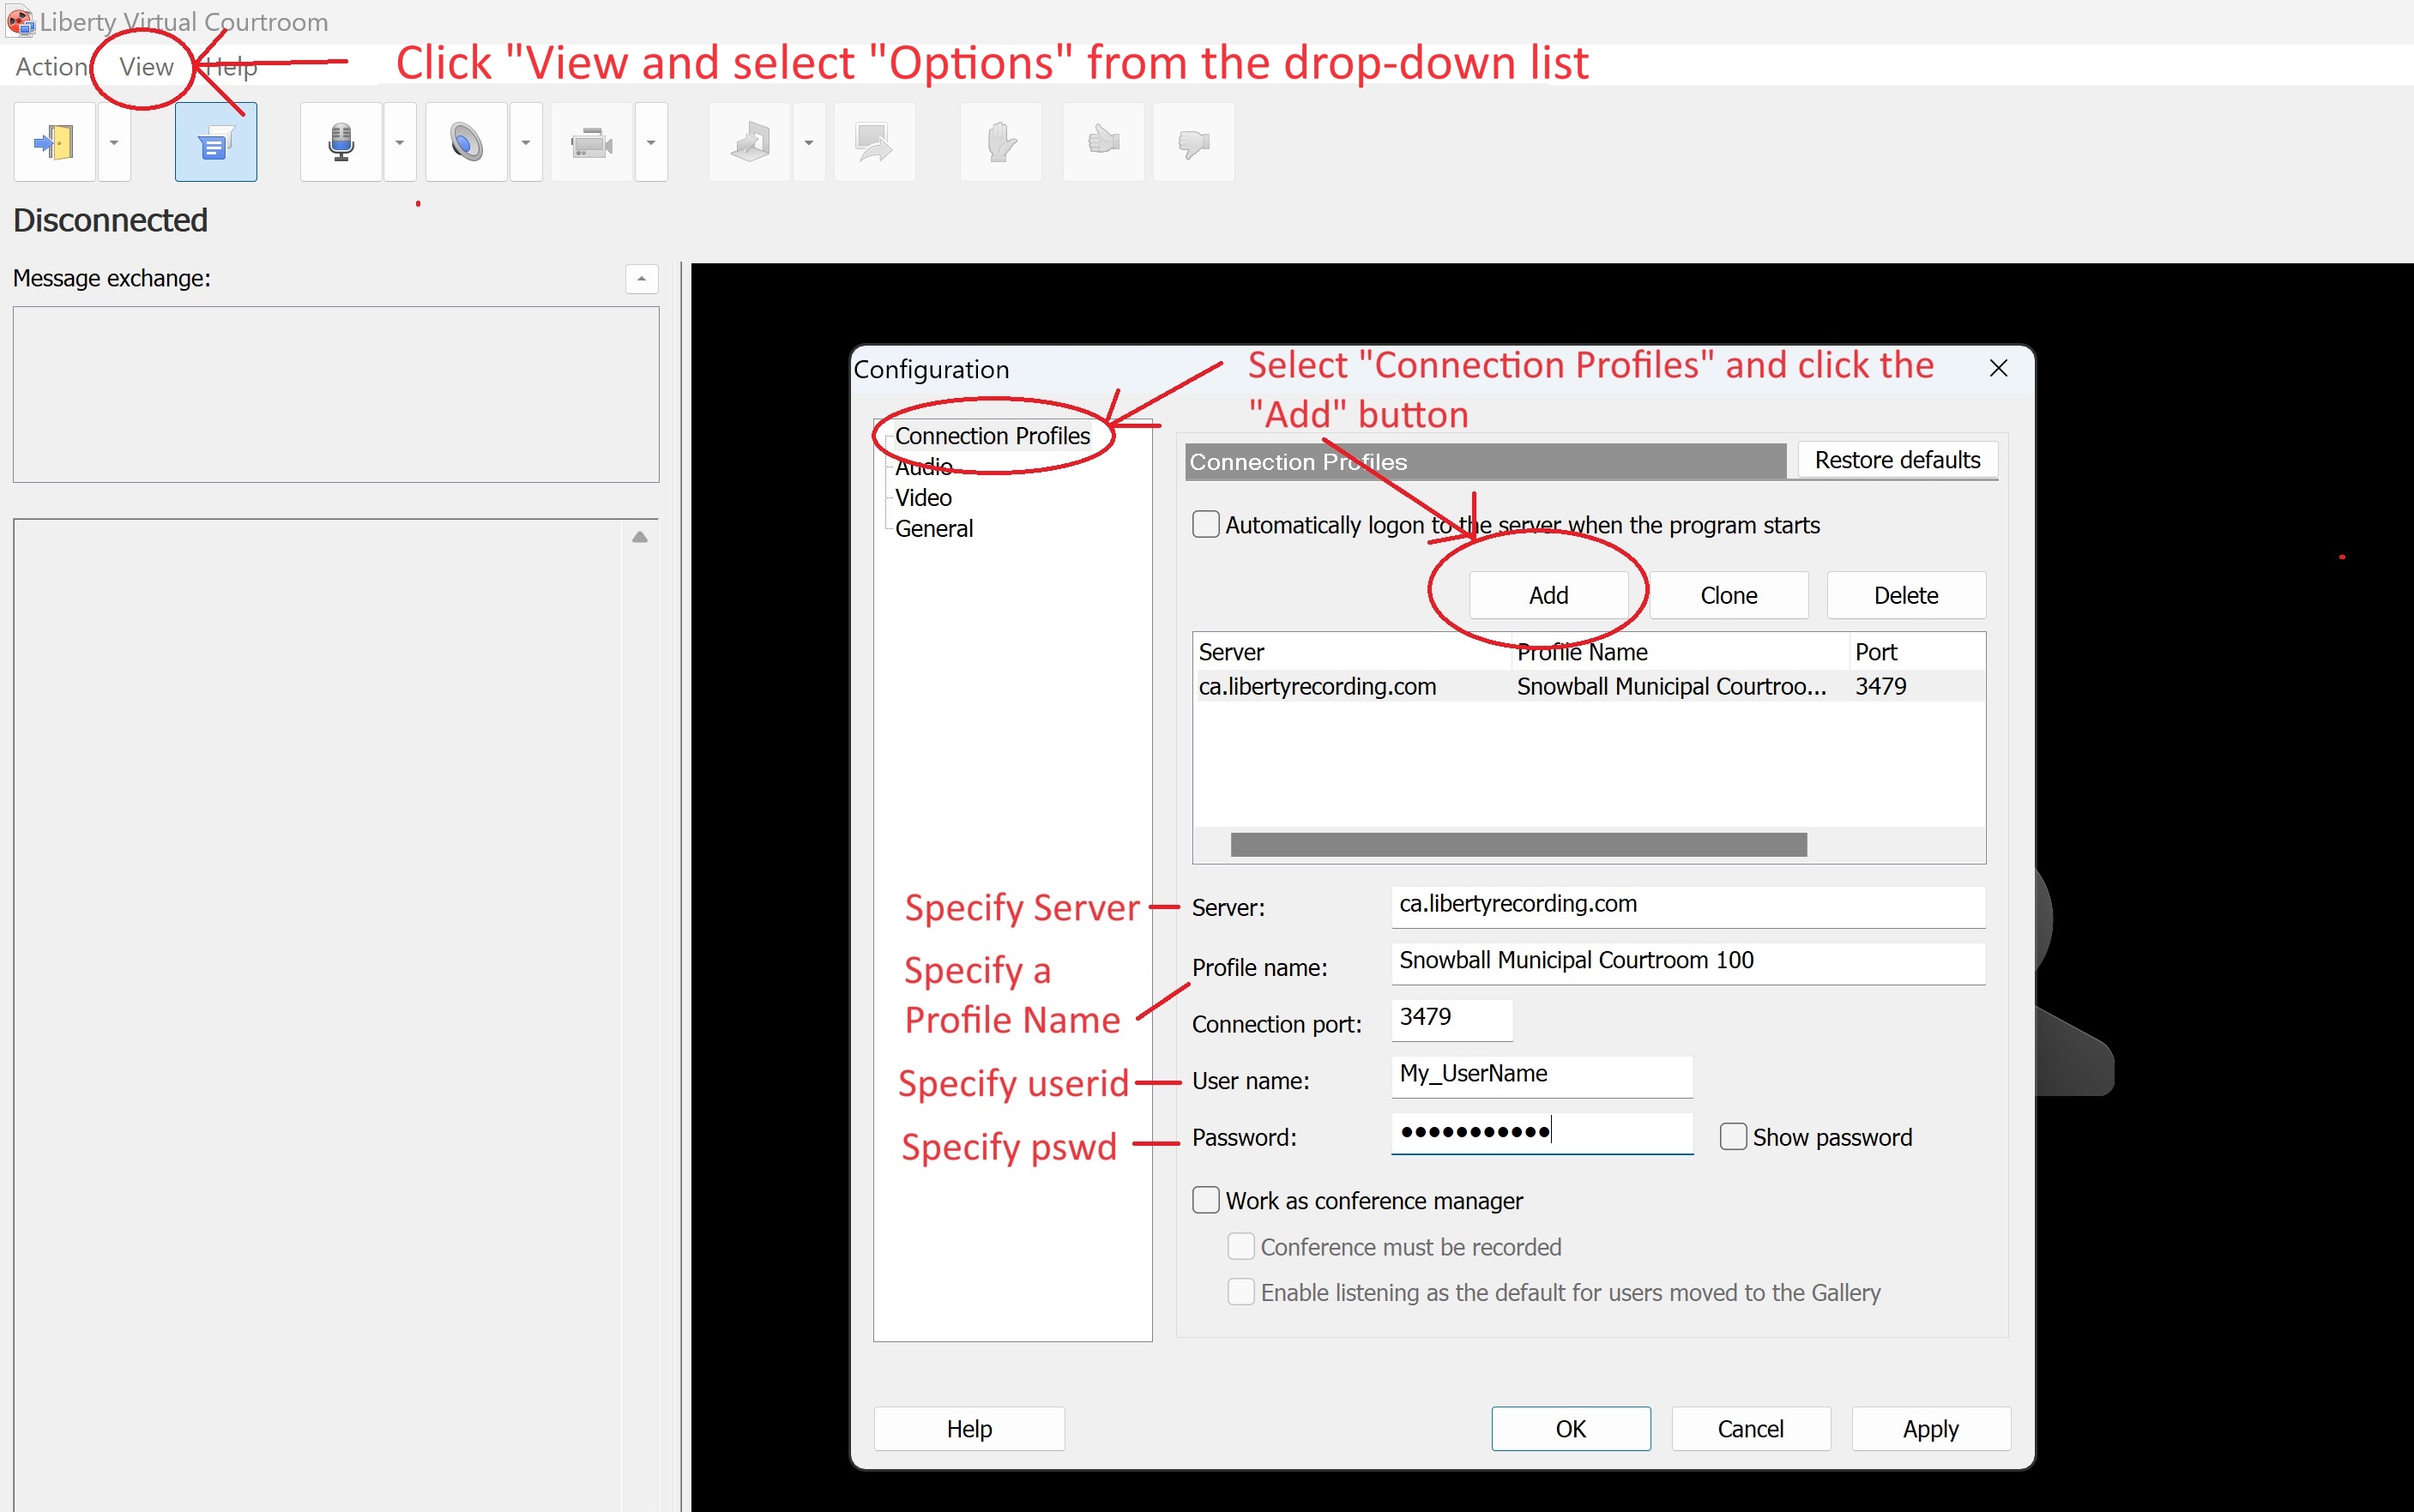
Logging On to the System

Also note that a list of all available profiles that may be accessed using the profile drop-down button. If your court operates more than one virtual courtroom, you must select the appropriate courtroom during the logon process using the profile drop-down, as shown below.

You may also watch the video provided below to see the program being configured.
Android Version of the Liberty Virtual Courtroom Program If you want to use the Liberty Virtual Courtroom program on an Android device, then you must first download and install the Android version of the program before clicking on the link to join a Virtual Courtroom hearing. The program requires Android System Version 5 or later.
Download and install the Android Liberty Virtual Courtroom program at no cost from the Google Playstore.
If you have been provided with a permanent id and password to access the courtroom, then you must configure the program as described below.
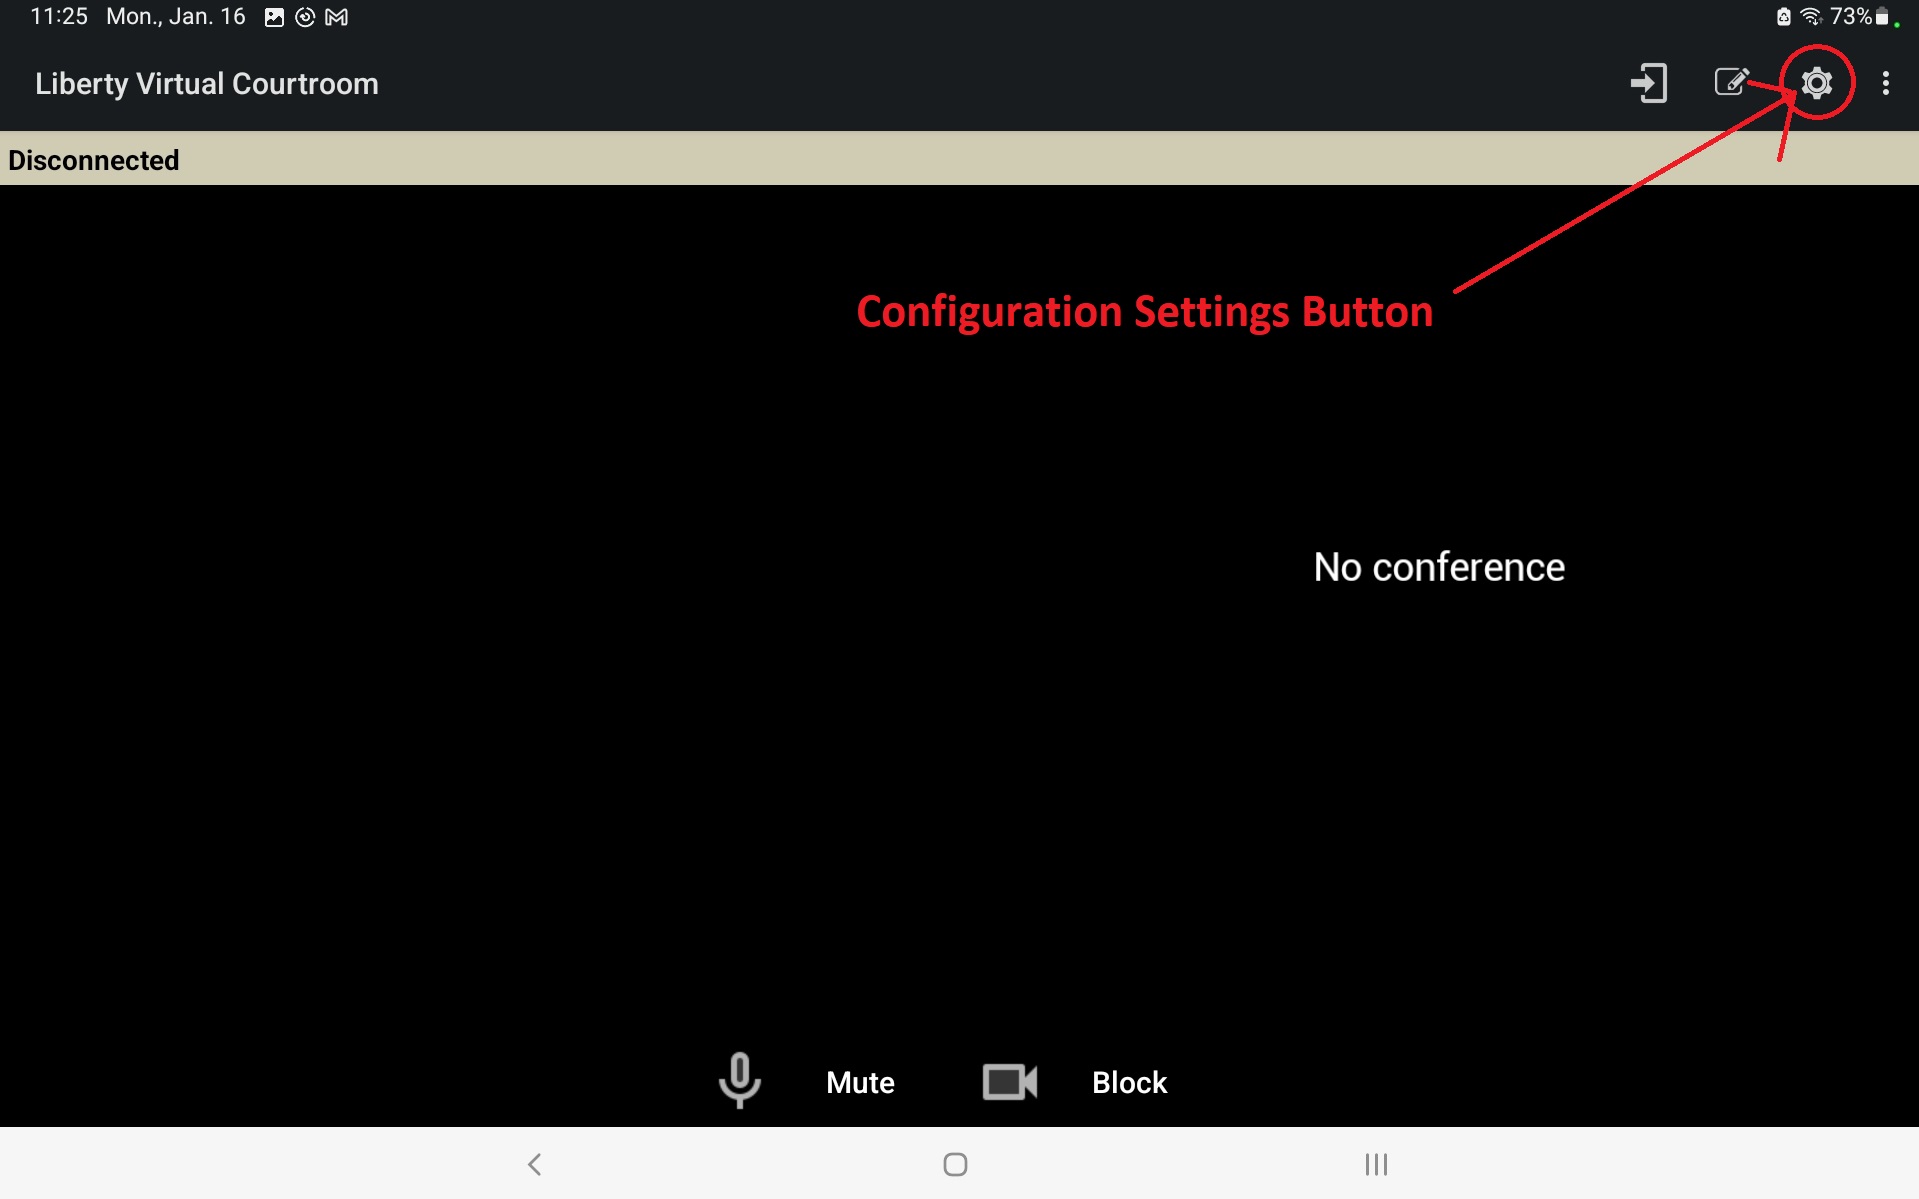
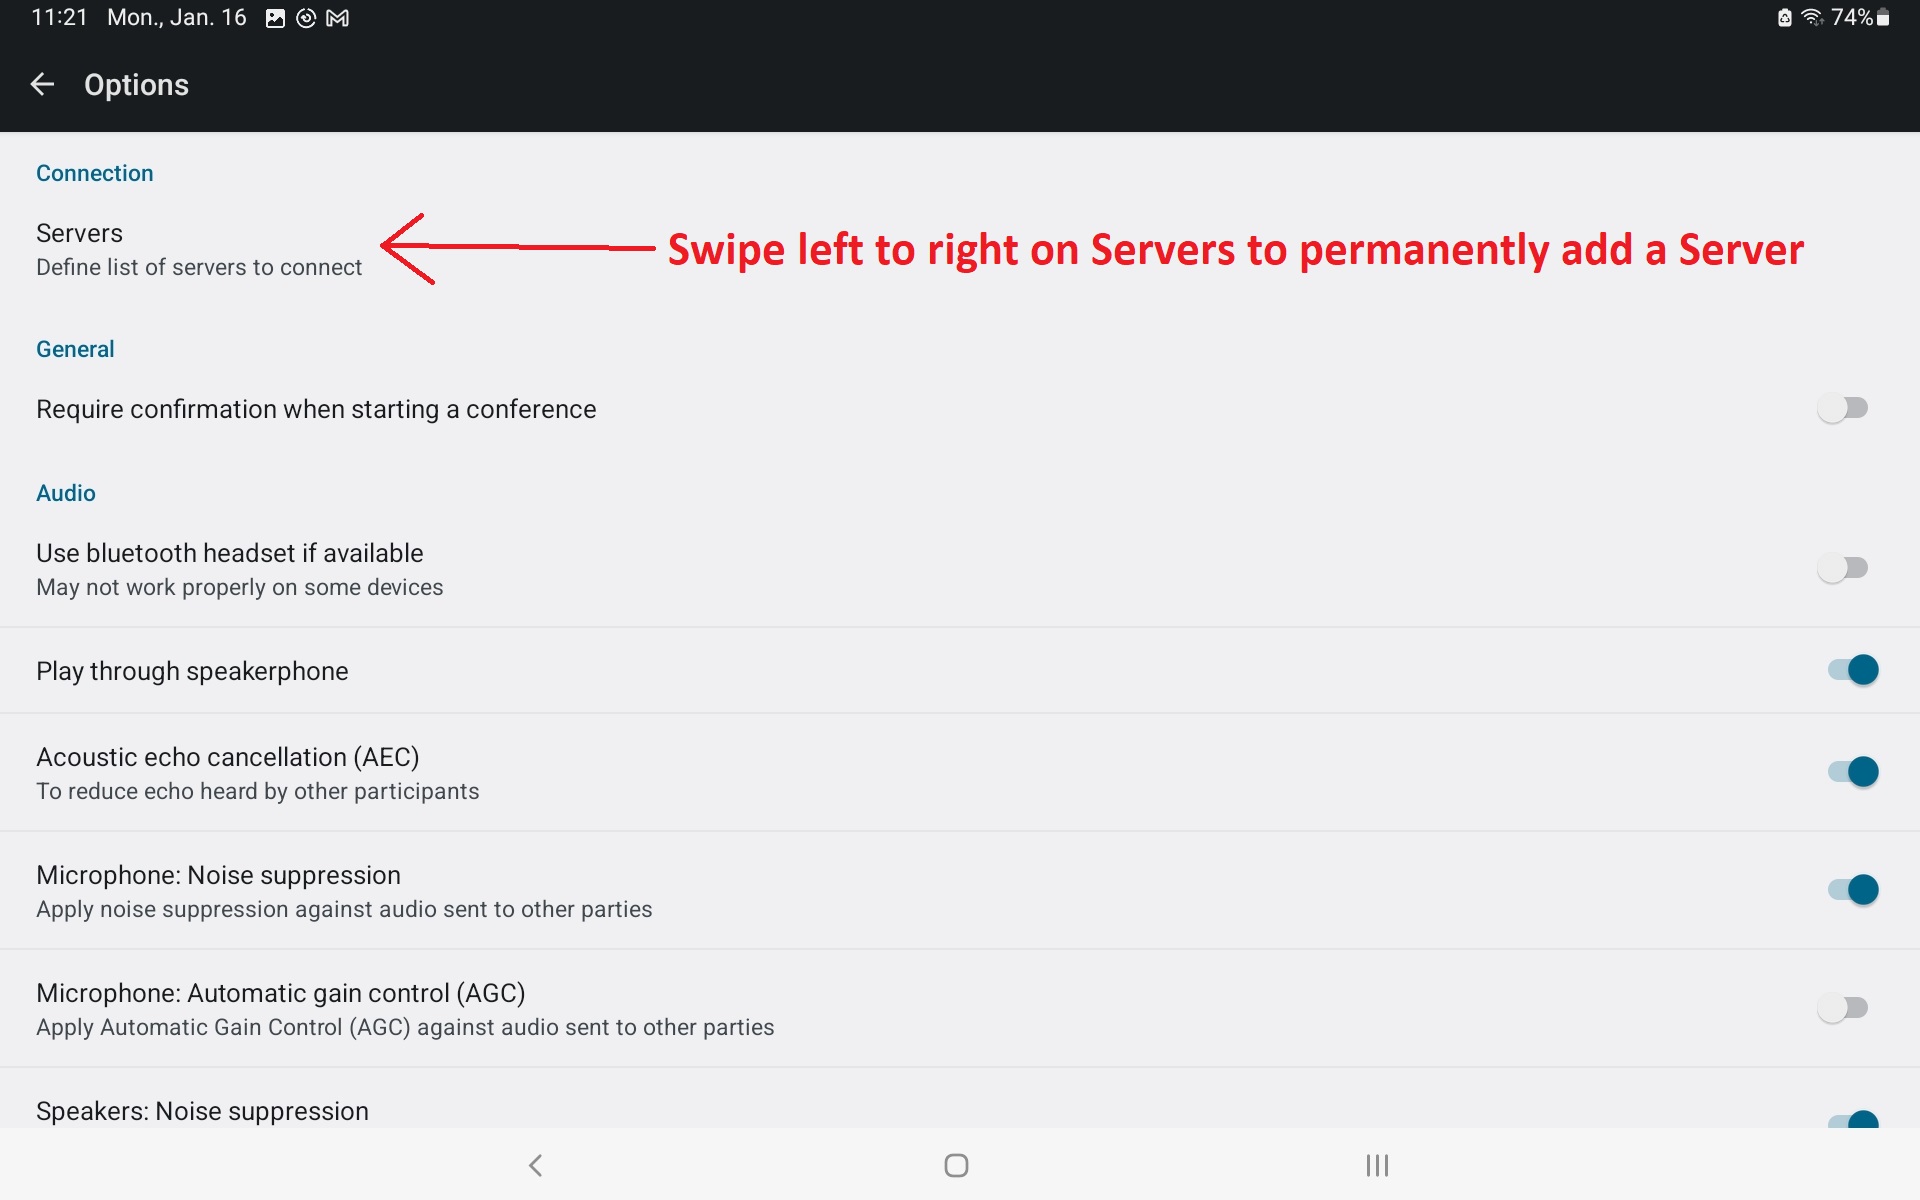
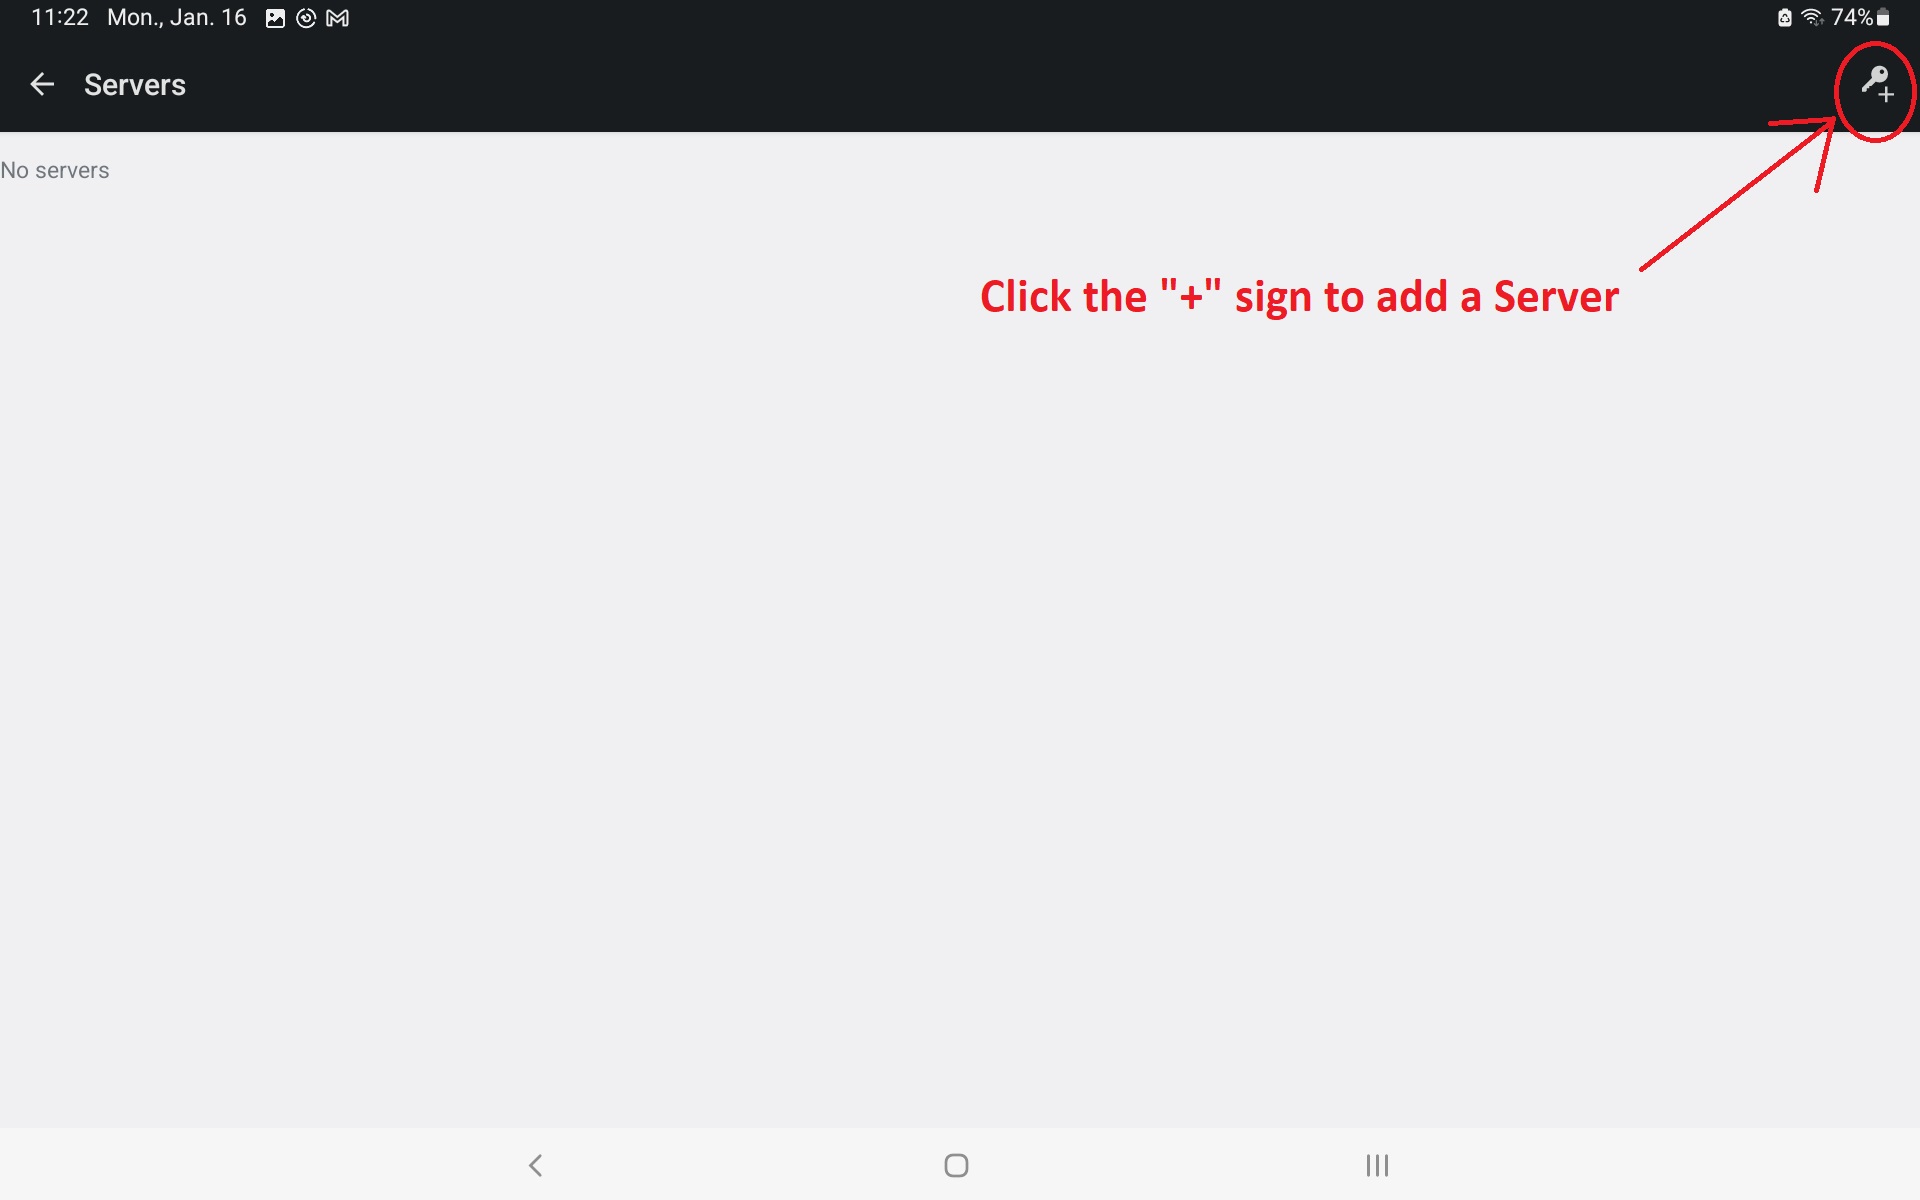
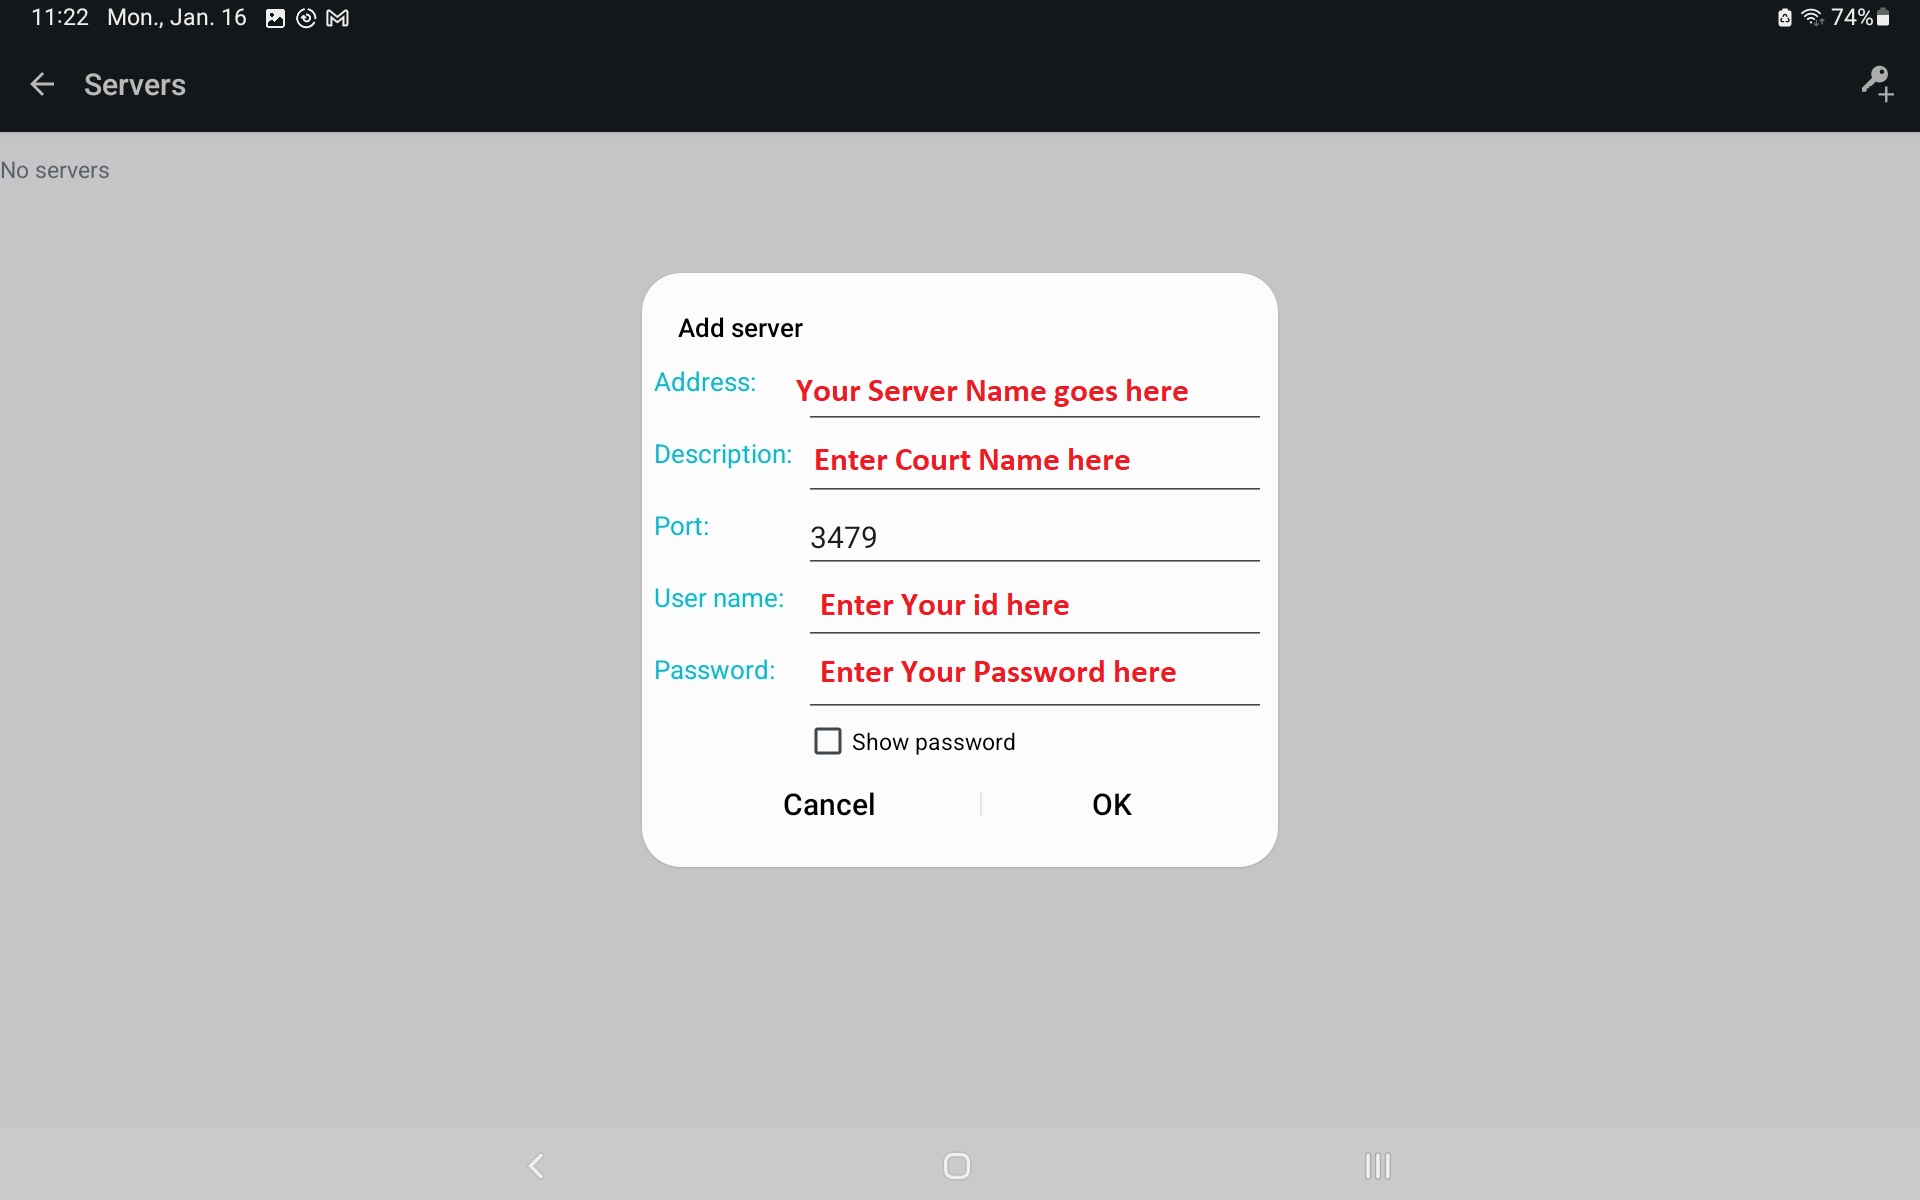
You should now return to the main program Window and click the Logon button when you are ready to logon to the Server. iOS Version of the Liberty Virtual Courtroom Program If you want to use the Liberty Virtual Courtroom program on an iOS device, you must first download and install the iOS version of the program before clicking on the link to join a Virtual Courtroom hearing. The program requires iOS 11 or later. If you have been provided with a link to connect to the courtroom, click on that link and the program will start automatically. If you have been provided with a permanent id and password to access the courtroom, then you must configure the program as described below.


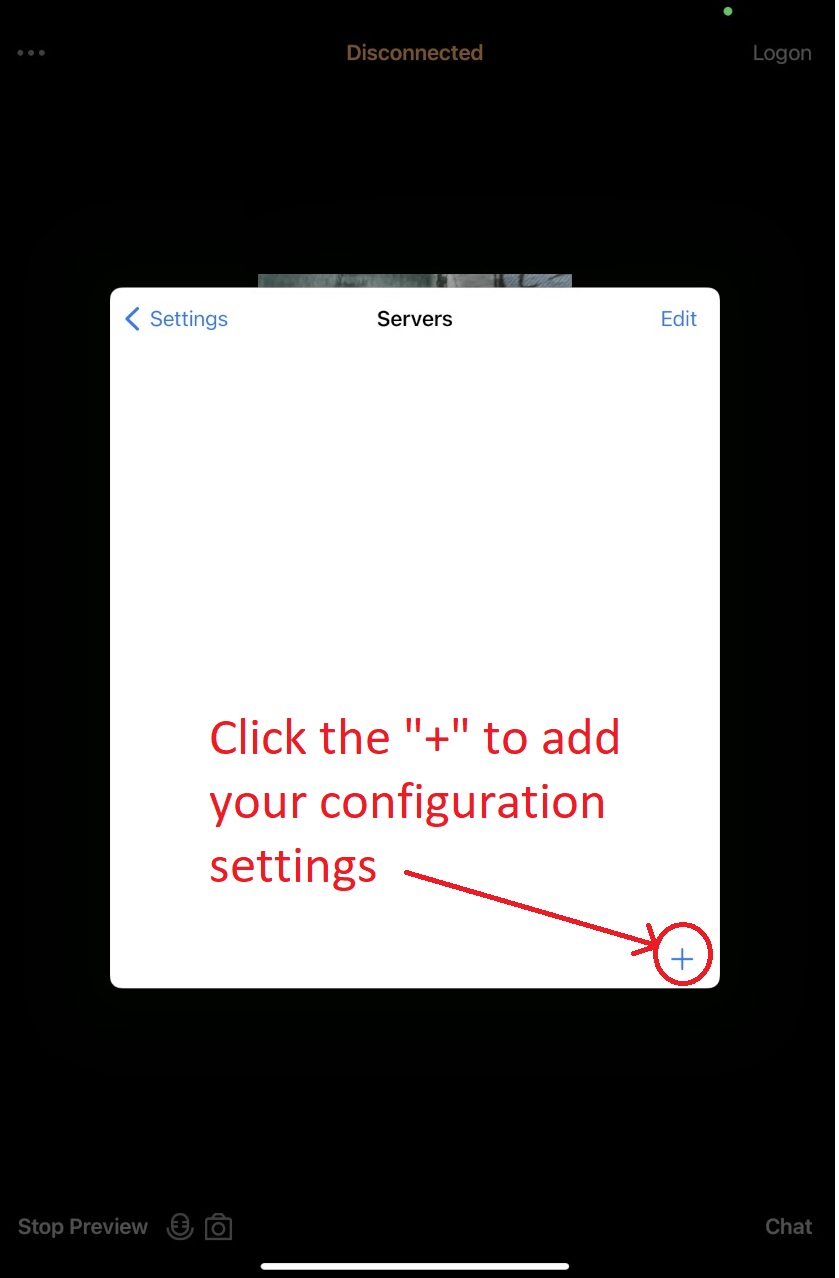
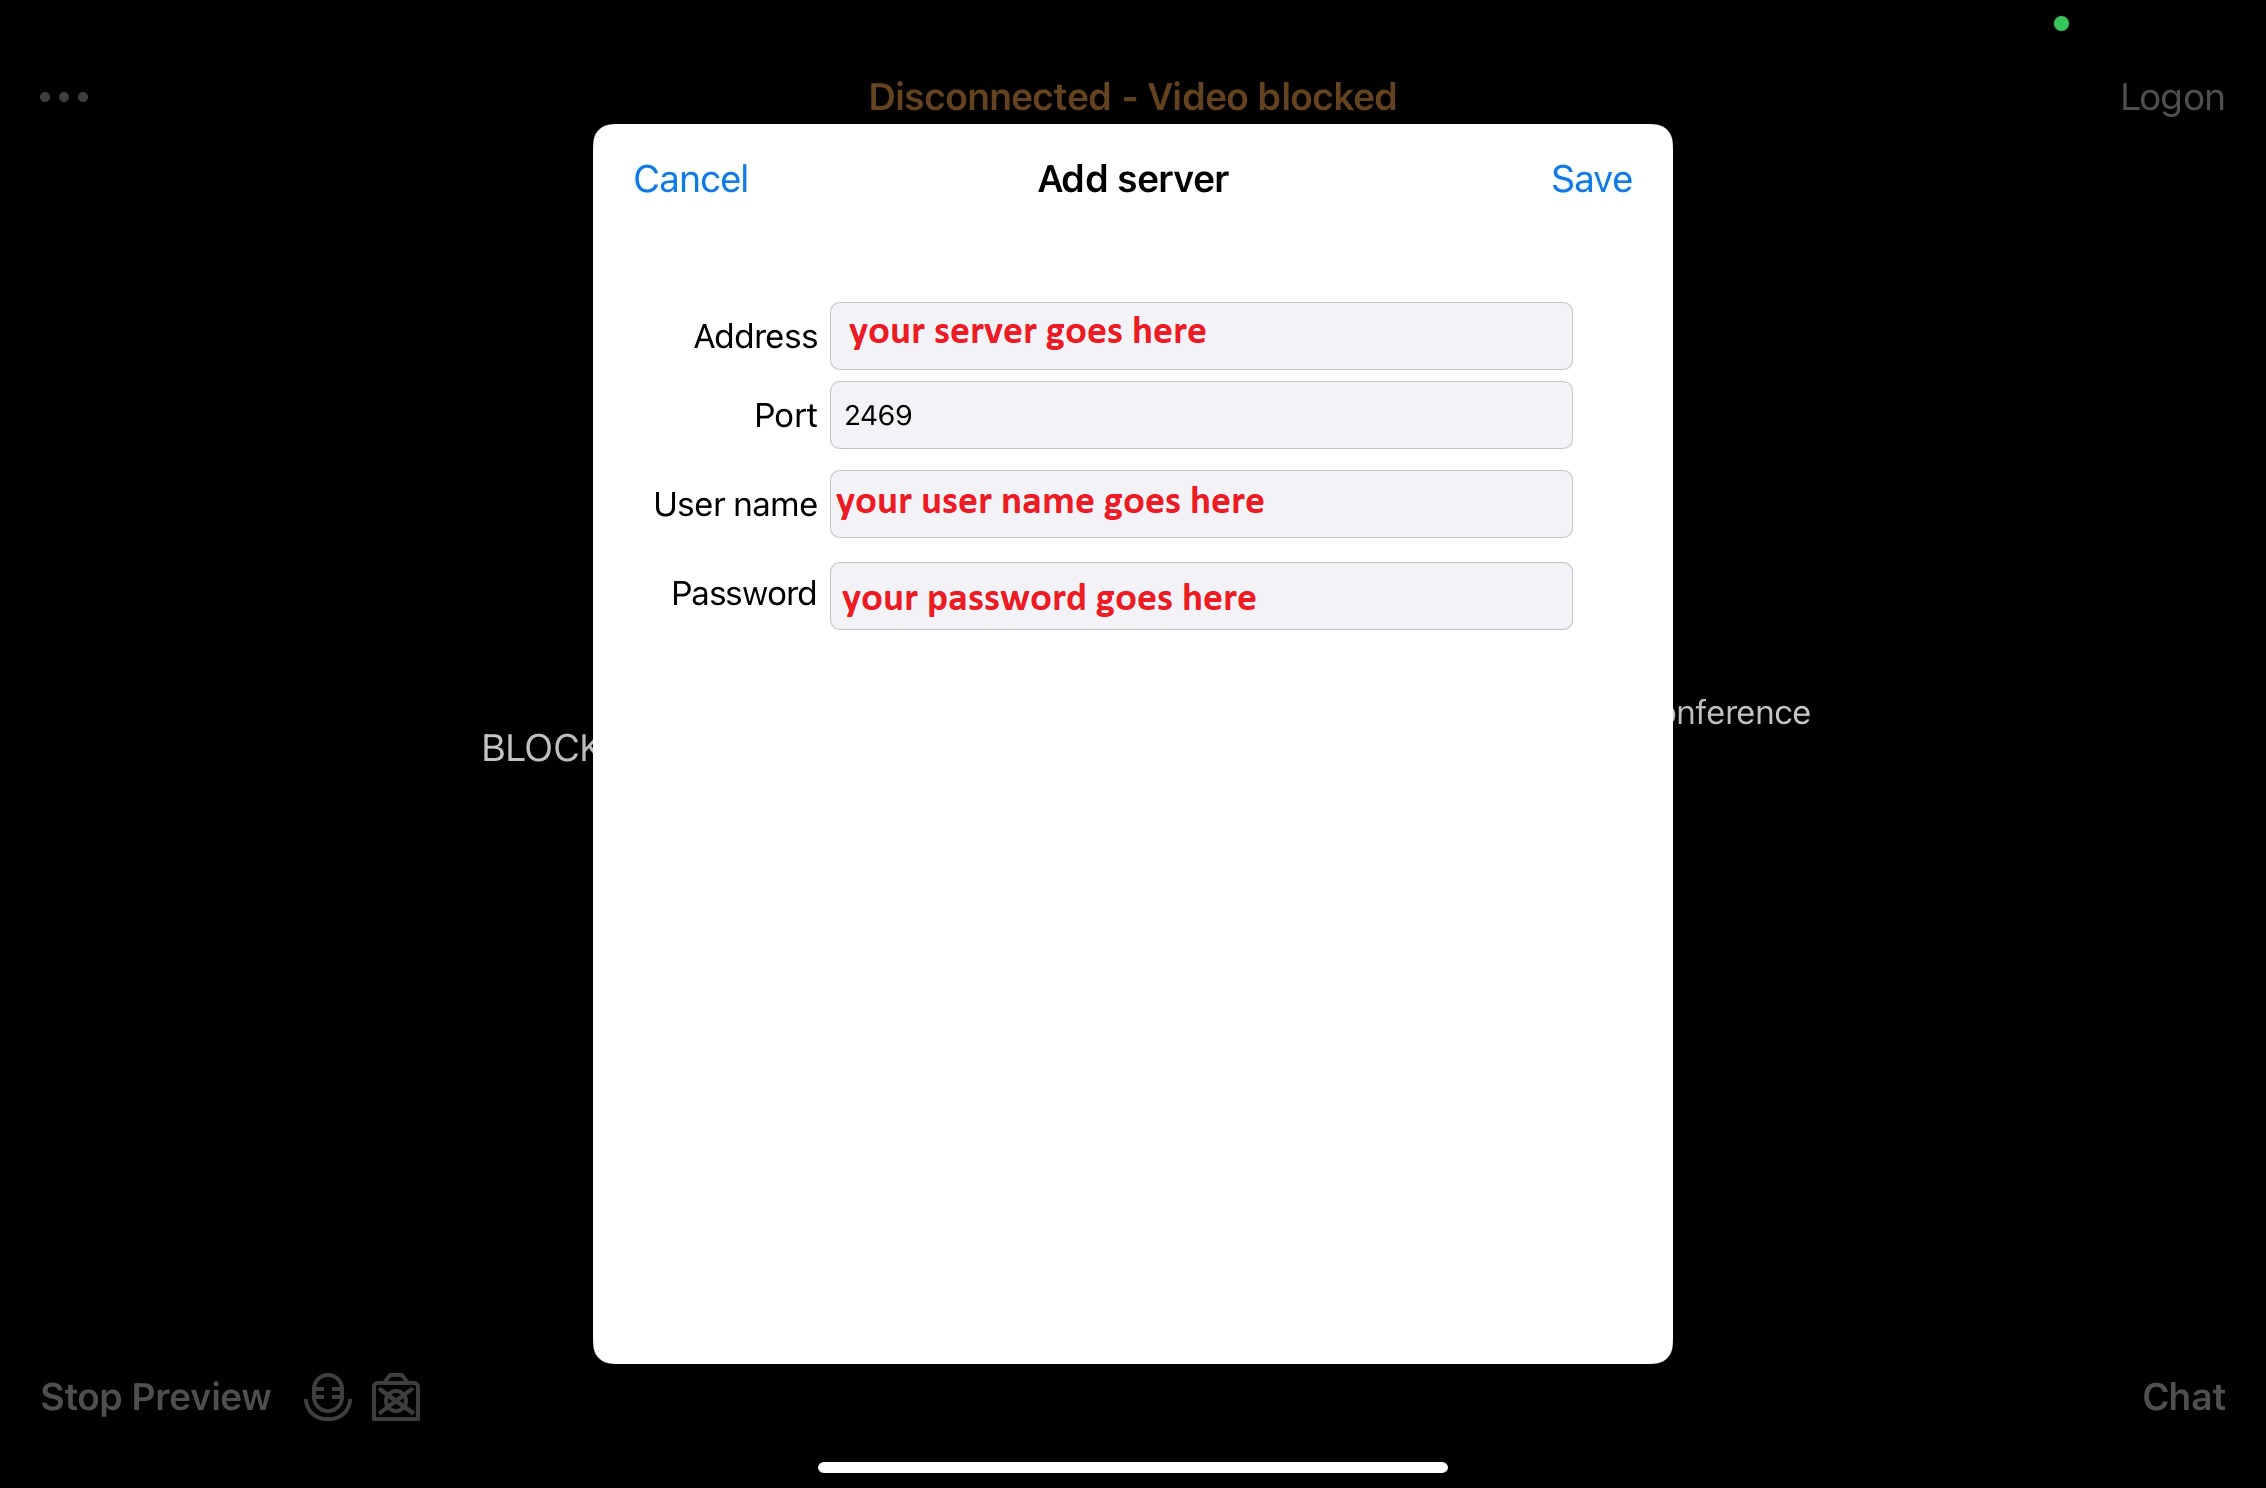
You can now return to the main program Window and click the Logon button when you are ready to logon to the Server.
|
|
Copyright High Criteria Inc. 2005-2026. All Rights Reserved. |